Tuesday, October 18, 2011
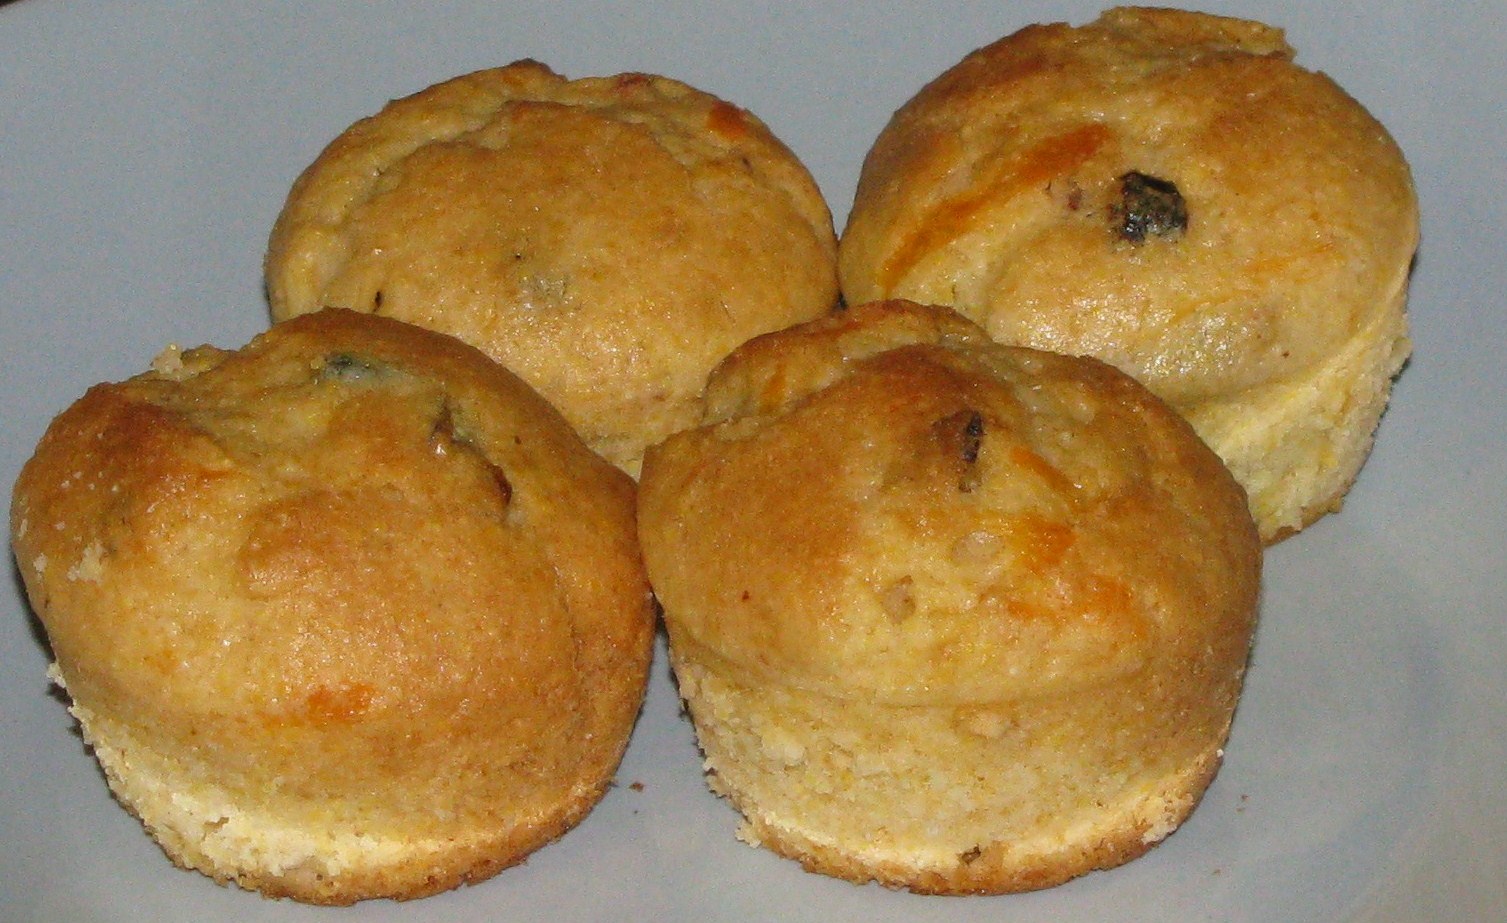
Jalapeno Popper Cornbread Muffins
This recipe came out of an attempt to spice up some cornbread, which is a food I usually don’t care much about. It also fell under the “things with jalapenos in it” food category that my husband enjoys. A couple months ago, I had made some good cornbread muffins by adding chopped corn and sautéed jalapenos to a store bought mix. Because the jalapenos were sautéed, they didn’t add too much heat. Instead they had a nice smoky flavor. It was also really nice to just add some ingredients to a box mix and come out with some great cornbread. I’d thought about adding bacon, but at the time I was cooking for a whole crowd and didn’t have enough.
This time I decided to try the jalapeno and bacon idea, along with other ingredients you typically see in jalapeno poppers. Again, I started with a box of cornbread mix. This time is was Krusteaz honey cornbread mix.
First, I chopped up and cooked three slices of bacon, reserving some of the grease for the jalapenos. I chopped up two jalapenos and sautéed those in the bacon grease until soft. I left the seeds in the jalapenos to try and reserve a bit of heat.
Next, I mixed up the cornbread according to the directions on the box. I also threw in a tbsp of brown sugar. I have no real reason for throwing in the brown sugar other than the fact I like sweet cornbread and it sounded like it would complement the jalapenos and bacon. Plus, when isn’t brown sugar a good idea? I thought maybe it would carmelized a little on the outside of the muffin.
Add the bacon and sautéed jalapenos to the bowl of cornbread muffin mix.
Now add about a 1/3 cup of shredded cheddar cheese. (I found the cheese flavor didn’t pop as much as I thought it might. If you prefer these super cheesy, add more.)
Mix all this up with the cornbread batter. You can see all the yummy stuff that's been added.
Pour into 24 mini muffin cups. I had a little extra batter left after my first batch of 24. Bake according to the package or until golden brown.
Here's a muffin that was impatiently removed. It gives a good view of all the ingredients.
For the full jalapeno popper experience, spread with cream cheese. Like most of the jalapeno based food I make, these went over well with my husband. I think he may have eaten about half the pan for dinner.
Friday, October 7, 2011
Gorgonzola, Apple & Bacon Stuffed Pork Loin
After a month long hiatus, I’m back to posting on the blog. I’ve had the material for this post for awhile now, but never got around to it. I think some of my hesitation with this post is that it’s near impossible to make pictures of raw meat look tasty. However, I promise you that the finished product is worth looking through a few pictures of uncooked meat.
My husband and I have a habit of making most of our big meat and potato type meals on Sundays. I think we fell into this pattern during the summer when we’d grill. Our grocery store had pork loins on sale, but I still needed to come up with a way to prepare it.
I stuffed this one with crispy bacon, gorgonzola, and sautéed onions and apples. I’m well aware that this blog probably reflects a pattern of bacon, apple and onion combinations, but it’s so good that it’s impossible to not repeat. I also used an 18 oz pork loin that was already packaged in a lemon herb marinade.
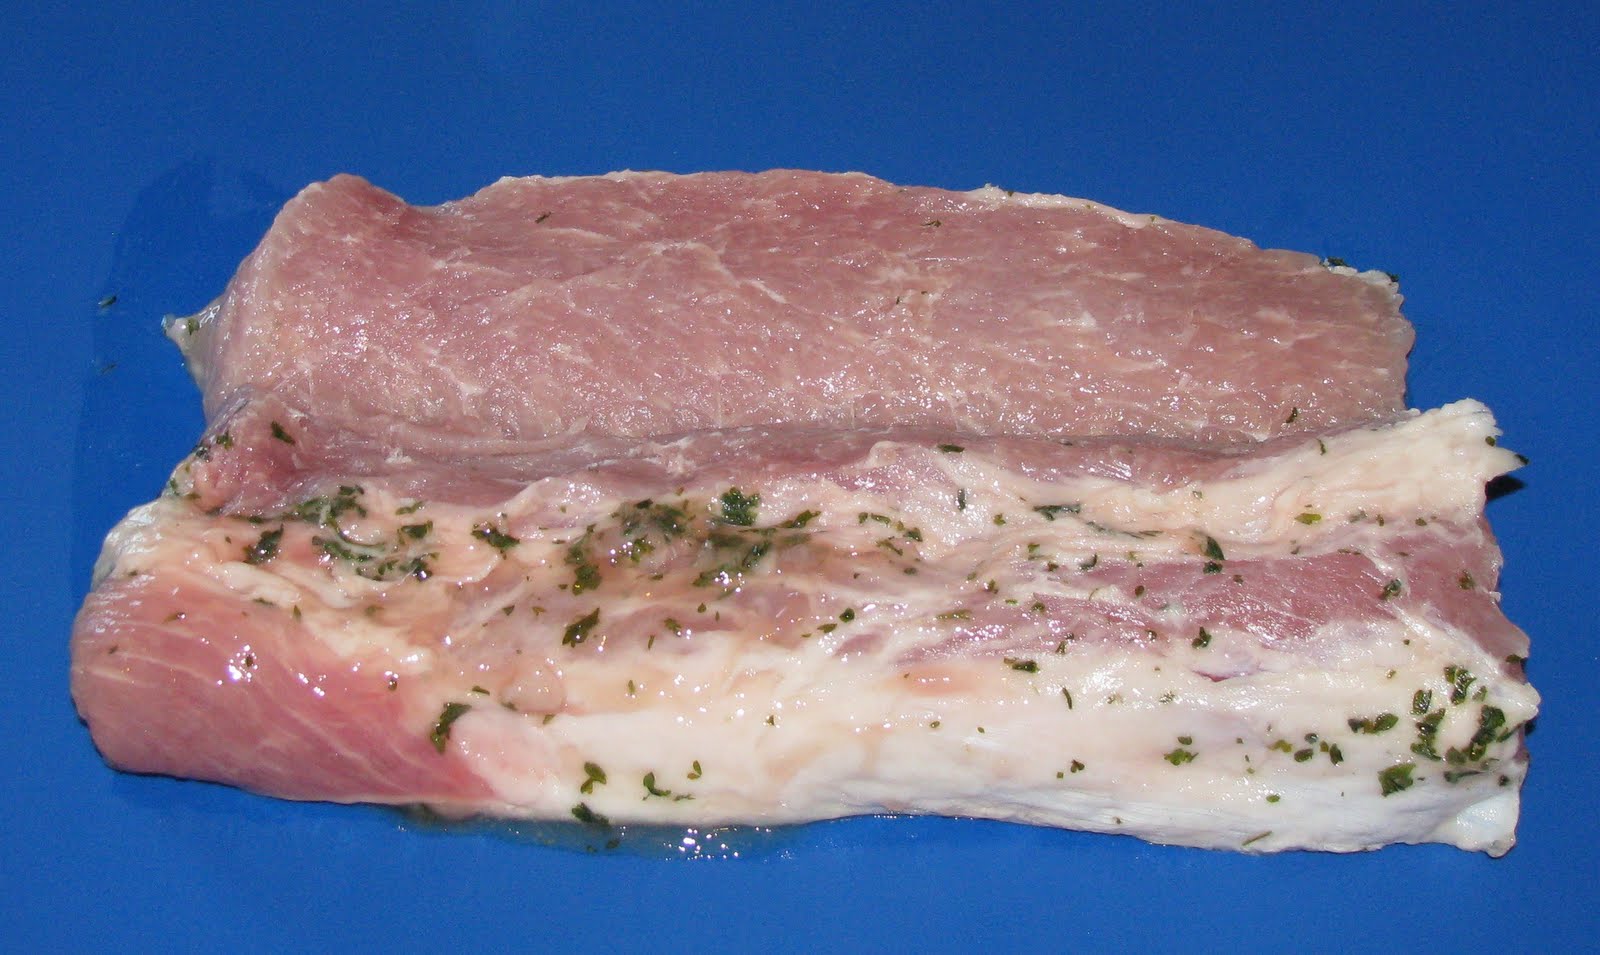
First, the pork loin had to be cut lengthwise to provide more surface area. The following is the easiest way I’ve seen it described. First, make a cut lengthwise about 1/3 of the way into the pork loin. Cut as close as you can until it’s flat against your cutting board, but be careful not to cut all the way through.
Next, you’ll notice that the 2/3 of the loin you haven’t cut into will look kind of like a wall that drops off into the flat area you have cut. Cut into the loin about half way up that wall. Again cut until it’s flat, but not all the way through.
I’ve heard the end result described as looking like an open book.
For the filling, I had cooked some chopped bacon and then sautéed some diced onions and apples in the grease, along with a little dried rosemary and thyme. I think this was about 1 apple, 1 medium onion and 3 slices of bacon.
I spread that all over the flattened pork loin, followed by a generous helping of some crumbled gorgonzola.
To wrap up the filling, I started at one end of the pork loin and rolled lengthwise. The pork loin will need to be tied with some butcher’s twine. You’ll notice mine was so stuffed that a little filling has come out the top.
Once it baked according to directions and desired temperature, I cut the twine and let the loin cool for about 5 minutes before slicing it.
This is what awaits you once you slice into it:
Look at the crispy bacon, sweet apples and onions, and gooey gorgonzola cheese. I’m already thinking about the next stuffed pork loin. How does roasted red pepper and goat cheese sound?
Monday, September 5, 2011
S'mores in a Jar
Everybody knows that s’mores are delicious. Now imagine this: you’re making a s’more, but instead of a piece of chocolate bar, there’s a molten chocolate lava cake in the center. Yep, that really just happened. This is the perfect union of s’mores and lava cake. Trust me, it’s as good as it sounds.
I absolutely love s’mores recipes. I probably save most of them that I come across. This s’mores in a jar recipe from How Sweet It Is really caught my eye. Not only was it a version of one of my favorite desserts, but I thought the mason jar idea was brilliant. In fact, I liked it so much that I had to go out and purchase mason jars just to make it.
I knew this easily portable version of s’mores would also work great for our weekend plans, which included visiting family members that were camping at the lake. (You’ll notice I said visiting other people who were camping. As much as I love s’mores, camping is not something I would choose to do voluntarily.)
I will warn you that this s’mores creation is still a bit of a work in progress. I may still try a few more variables. In my first batch I tried big marshmallows, but found they did not want to completely puff up and melt quite enough. As a kid, I seem to remember one marshmallow taking as little as 20 seconds to expand to approximately the size of the entire microwave, so I’m not sure why this wasn’t working. Anyway, I tried marshmallow crème the second batch, which had a better consistency but was way too sweet. The marshmallow topping will still require some experimentation. It may be something as simple as roasting four big marshmallows and sticking them on top before digging into all the s’mores goodness. These were also so sweet that I would consider making them in half pint jars next time.
The concept for this recipe comes from How Sweet It Is, which is one of my favorite food blogs to follow. That version uses a different recipe for the cake part. I was curious about using lava cake, since that would replicate the gooey quality of melted chocolate in s’mores. My lava cake recipe is from Taste Junction.
S’mores in a Jar:
4- 16 oz jars
Graham Cracker Bottom:
• 1 ½ cups of graham cracker crumbs
• ½ stick melted butter
• dash of salt
Put graham crackers into gallon Ziploc bag and use rolling pin to crush. Mix graham crumbs with melted butter. Spray each jar with non-stick cooking spray. Put approximately 6-7 tbsp of the graham cracker mix in the bottom of each jar. I used an ice cream scoop to press it down evenly.
Lava Cake Center:
•4 tbsp unsalted butter, room temperature
•1/3 cup granulated sugar
•3 large eggs
•1/3 cup all-purpose flour
•1/4 teaspoon salt
•1 tsp vanilla extract
•6 ounces bittersweet chocolate, melted & cooled
Preheat oven to 400 degrees. Cream butter and sugar until fluffy. Add eggs one at a time, stirring after each addition. Stir in vanilla. Beat in flour and salt just until combined, then beat in melted chocolate just until combined. The chocolate can be melted in the microwave if you stir every 30 seconds until smooth. I used semi-sweet since that is what I had in my cabinet. I prefer this recipe with bittersweet, but semi-sweet may seem closer to the milk chocolate of traditional s’mores.
Scoop batter into the jars until they are about half full. I used a ¼ measuring cup and this turned out to be approximately ¾ cup batter for me. Place jars in a baking pan with 1 ½ cups of water in the bottom. Bake until the top of the cake is just set. I baked mine about 15 minutes, but mine was still too gooey. I’m guessing 20-25 minutes would be closer.
Once jars are out of the oven, fill in some marshmallow crème or marshmallows. Place under the broiler for about 1-2 minutes until top starts to brown. For my second attempt, we used marshmallow crème, but placed a couple marshmallows on top just for the appearance.
My biggest concern about this recipe was baking in the glass jars. The last thing I needed was a shattered glass mess in my oven. The first time I tried these, I used a recipe that called for 350 degrees. That worked fine, but then I was still a little hesitant about the lava cake recipe that baked at 400. After doing a little research online, it appeared that lots of people have recipes for cakes or pies in jars.
The Helpers were in curious mode the day I made these. Helper #1 impatiently waited for me to move the jars out of their box so she could commandeer it.
Helper #2 impatiently waited for someone to drop some buttery smelling crumbs within her reach.
Stayed tuned for more versions of this recipe. My husband has suggested a version where the layers are alternated more frequently. For example, there'd be small layers of graham cracker, chocolate cake, mini marshmallows, graham cracker, cake, marshmallows, etc. If any of you have some suggestions, I'd love to hear them!
Thursday, September 1, 2011
Rich Fudge Brownies with Cherry
Sometime after my last post, this blog hit 1,000 viewers. I never had any real expectations for the blog, so I’m pleasantly surprised that people are showing any interest. In celebration of this milestone, I made my mother’s rich fudge brownies. I should probably warn you that something as exciting as an odd-numbered day is enough excuse to “celebrate” with these brownies. They’re rich and super gooey in the middle, with the thinnest layer of crispiness of the top. I believe the last time this brownie recipe made an appearance was in our church’s cookbook back in 1990. There may be a handful out there in possession of said book that have gotten to revel in this chocolate deliciousness. If you haven’t, your wait is officially over.
As with a lot of the recipes I’ve tried, I added something extra this time. I have been somewhat obsessed with cherries over the summer, especially after my luck with pairing them with scallops. I’ve seen some recipes popping up, such as here and here, that involve putting roasted cherries in the brownie batter. I tend to be a bit of a purist when it comes to chocolate. Sometimes caramel is ok, but I have no use for additions such as fruit or nuts of any kind. Sometimes a simple square of dark chocolate is perfection, and we all know it’s a bad idea to mess with perfection. That said, I finally decided to make an exception. I should probably note that my poor mother, who dislikes cherry, probably would not approve of my addition to the recipe.
I started by roasting a cup and a half of cherries that were pitted and halved. I mixed those with a couple teaspoons of sugar and spread them out on a baking sheet.
The cherries are then baked at 450 degrees for about 5-7 minutes. The cherries will start to release some juice. The main thing to watch for is that the sugar doesn't start to burn. Once they are out of the oven, you’ll want your temperature down to 300. This gave the cherries a chance to cool as the oven did.
As for the brownies, the ingredients are as follows:
• 1 cup butter (original recipe says oleo)
• 4 squares unsweetened baking chocolate
• 4 eggs (beaten)
• 2 cups sugar
• 1 cup flour
• 2 tbsp vanilla
Start by melting the butter and chocolate over medium-low heat. You’ll want to use a pan large enough to add the other ingredients also. Stir pretty consistently until melted.
Next, add the sugar, followed by the eggs. I add the eggs after the sugar to avoid scrambling them with the hot chocolate mixture. Add the flour, followed by the vanilla.
Stir in cherries or other desired mix ins. Pour into a greased 9x13 pan. Bake until done, which is usually about 40-45 minutes. I go by the toothpick test.
Now you know these brownies are serious because they call for two sticks of butter and two cups of sugar. I’m not sure if this is enough to make Paula Deen proud, but I think we’d at least get a nod of approval. This makes a large pan, so there’s all the more for you to
I'll end this post with a picture of my Helpers, who have not made an appearance on the blog in awhile. Desserts do not hold near the appeal that other dishes do, so they spent their time lounging in the sun and observing.
Sunday, August 21, 2011
Italian Herb & Cheese Pull-Apart Bread
Even though I do a lot of baking, I don’t really try a lot of bread recipes. I think part of the problem is that with just my husband and I, fresh bread goes stale before we manage to get it eaten. We make plenty of Italian at our house, but I rely far too often on grabbing the 99 cent garlic bread from the store. However, when I saw a recipe for Italian herb & cheese pull-apart bread, I couldn’t resist making it myself.
This recipe seemed pretty simple. In fact, it doesn’t even require a bread maker. (I actually do have a bread maker, but don’t ask how many times I’ve actually gotten it out and used it.) Of course, nothing sounds bad about Italian herbs and cheese. Just the name of the recipe alone makes me want to make up a big batch of pasta and sauce to dip it in. I was also intrigued by the design of the bread. Once rolled out, the dough is cut into squares and stacked in the pan. Once baked, a slice can be torn off easily with your fingers, hence the “pull-apart” in the name.
The recipe comes from the blog Pink Parsley, which I’d recommend checking out. The pictures are mouthwatering and I’ve found other delicious recipes there before.
Bread
•2 cups bread flour
•1 cup all-purpose flour
•1 cup warm water
•1 packet instant yeast (2 1/4 tsp)
•3 Tbs sugar
•3/4 tsp salt
•2 Tbs butter, melted
Filling
• 3-4 cloves garlic, minced
•3/4 cup herbs (I used a dry mix of Italian herbs)
•1 cup cheese (I used an Italian blend of about 5 cheeses)
•4 Tbs butter, melted
•kosher salt and freshly ground black pepper
In the bowl of a stand mixer fitted with the paddle attachment, combine the water, sugar, and yeast. Add the first 2 cups of flour, and mix until combined. Switch to the dough hook, and with the mixer on low speed, add the third cup of flour, a few tablespoons at a time, until the dough forms. Knead 6-9 minutes, until soft and pliable, and it no longer sticks to the sides of the bowl.
Turn the dough out onto a lightly floured surface and knead to form a smooth ball. Transfer to a lightly oiled bowl and allow to rise 1-2 hours, until doubled in size.
Punch down the dough and turn out onto a lightly floured surface. Allow to rest for 5 minutes. Meanwhile, chop the herbs and garlic, melt the butter, and grate the cheese.
Roll the dough out into a 12x20 inch rectangle. Brush with 2 tablespoons of the melted butter, then sprinkle the dough with the garlic, herbs, and cheese. Sprinkle with salt and pepper to taste.
Cut the dough into 6 equally sized strips using a pizza cutter or knife. Stack the strips on top of each other and cut into 6 equally-sized squares.
Grease a 9x5 inch loaf pan, and stack the squares on top of each other in the pan. I found the best way to do this was to hold the pan on its side and stack them that way. If you lose some of the filling as you stack, just sprinkle it on top once the dough has been stacked. Drizzle the remaining 2 tablespoons of melted butter over the top.
Cover with a clean kitchen towel and allow to rise 40 minutes.
Preheat the oven to 350 degrees. Bake the bread 35-45 minutes, or until the top is golden-brown and the inside is cooked through. If the top browns too quickly, cover the bread with foil.
Remove from oven and allow to cool for at least 20 minutes.
I love the design of the bread. It is so easy and simple to pull off a slice. I think next time I try it, I will have to use some cheddar or a slightly sharper cheese. I will also have to try the cinnamon and sugar version sometime.
Bacon Apple Risotto
Lately I’ve been on a mission to perfect risotto. It’s been a bit of a learning experience. I’ve had many tries where no matter what I do, the rice doesn’t quite cook enough.
I had found a recipe for bacon and apple risotto. It sounded a bit different, but definitely worth a try. Along with the bacon and apples, the recipe called for garlic and thyme. As I began cooking all of these together, the recipe began to remind me of Thanksgiving. Smelling the ingredients while I cooked made me wish for fall.
I tried something a little different with the rice this time. The recipe suggested par boiling it for a few minutes in order to soften it up. The problem is that the starch from the rice is what gives the risotto some of its creaminess, so I didn’t want to drain out all the starchy water it had boiled in. The trick then became how to boil it with as little water as possible, so I could reserve some of the water and the starch.
Here’s the recipe, as taken from Drizzle and Dip:
• 250gms arborio / risotto rice
• 1 brown onion finely chopped
• 1 Granny Smith apple peeled and chopped
• Approx. 4 slices bacon, chopped
• 2 cloves of garlic, minced
• 1/2 cup of dry white wine
• about 2 cups chicken stock (hot).
• a small handful of thyme leaves
• 1 knob of butter
• salt and black pepper
• approx. ½ cup shredded Parmesan
While I par boiled the rice for 5-7 minutes, I heated a high-sided pan. I chopped up 4 slices of bacon and diced up some onions with a Pampered Chef chopper. The onions I used were some cute candy onions that I’d found at the local farmers’ market. They almost smelled sweet enough to take a bite out of, so I thought they’d go great with the apple.
While the onions and bacon cooked for a few minutes, I peeled a Granny Smith apple and chopped it up into small pieces with the same chopper I used for the bacon.
Once the bacon was starting to look slightly crisp and the onions were becoming translucent, I added the chopped apple to the pan. At this point, I also added the garlic.
I let that mixture cook for a couple minutes before adding the rice that I had par boiled. I didn’t drain much of my water so that I could reserve the starch. Once the rice is added, I stirred it together to make sure the bacon grease coated the rice. Next I added the wine and allowed it to cook down. At this point, I added some thyme and about ½ cup of the chicken stock. (This was the point I mentioned where it began to smell like Thanksgiving. This was also probably the point where my stomach started growling.) As the chicken stock cooked and became absorbed, I added another ½ cup. I continued this process until I’d used approximately 2 cups of chicken stock.
Once the liquid had been absorbed and I tested the rice to make sure it was done, I removed it from the heat and stirred in a pat of butter and about a ½ cup of shredded parmesan cheese. I also added a little salt and pepper to taste.
I realize my measurements aren’t too precise, but sometimes I go more by taste with risotto. This recipe really makes enough for at least four servings. The apple, bacon and thyme go so well with the creaminess of the rice. My husband was especially happy with this recipe because he thought it had more flavor than some of the other risottos he has tried. I was impressed enough with the recipe that I had to write my mother and let her know that I’d found another side dish for our Thanksgiving dinner this year.
Sunday, August 7, 2011
Scallops with Cherry
Sometimes I run into the grocery store for certain ingredients and something else grabs my attention. This is exactly what happened one day when I went to get some hamburger, but instead found myself in front of the counter looking at some giant scallops. Where I live, it’s not very often that I find fresh scallops much bigger than a marshmallow. When I do, I can’t resist the temptation. I asked for three of them, which came up to about ½ a pound.
I have far too many scallop recipes stowed away. This time I felt like getting away from the traditional garlic and herb method. I remembered seeing some recipes using cherries, and it just so happened that I had some sweet red cherries in my fridge. Cherries with scallops seemed a little adventurous, but sometimes that’s the best part of cooking. I knew I would need something to bridge the two. I used shallots for their slightly sweeter flavor.
I first rinsed the scallops and patted them dry with a paper towel. I then sprinkled them with salt & pepper. To sear the scallops, I poured some olive oil into a skillet and let the oil heat up. Once the oil was very hot, I placed the scallops in the pan.
I’ve always heard that you only want to flip scallops once. I let one side cook for 3-4 minutes before flipping them over to the other side for the same amount of time. This may take less time depending on the size of the scallops. I like my scallops to have a nice, caramelized top.
While the scallops were cooking, I pitted and chopped up about ¾ cup of fresh cherries. The hardest part about this step is getting all the cherries to a bowl instead of snacking on them as I go. I also diced one shallot.
When the scallops were done, I placed them on a plate & tented them with foil. I added the shallots to the leftover drippings and cooked for a couple minutes. Next I added the chopped cherries, a splash of white wine and a splash of chicken broth. I let that cook on medium low heat until the cherries started to soften and form a bit of a mash. Once the sauce was cooked, I plated my scallops and poured the cherry mixture over the top.
There are some food combinations that I joke should be married in the food world. I’m beginning to think that scallops and cherries may be one of them. This is one slightly risky recipe that really paid off. Now I just need to decide what scallop recipe to try next. Now that I know fruit worked out well, I could try scallops with watermelon soup. I could also get even more adventurous and try vanilla bean. The possibilities seem endless, but that’s yet another one of my favorite things about cooking.
Subscribe to:
Posts (Atom)