Showing posts with label Chocolate. Show all posts

Wednesday, August 22, 2012

S'mores Cake


Let me start by explaining this picture. What you're looking at is rich chocolate cake, layered with toasted marshmallow filling and topped with graham cracker buttercream. It's a perfect version of indoor s'mores.


If you haven’t figured it out by now, I’m completely obsessed with s’mores recipes. This will come as no surprise to the people who follow me on Pinterest. It doesn’t help that Pinterest has provided me with an even bigger opportunity to collect s’mores recipes.

The thing about s’mores recipes is that only about one in every ten really turns out to be any good. I did finally find an awesome s’mores cookie recipe a couple weeks ago. I’ve also experimented with s’mores cakes and cupcakes before, without a lot of success. Most of these used a graham cracker cake, which never seemed to turn out very flavorful. About a week ago on Pinterest, I found a cupcake recipe that used chocolate cake and incorporated the graham crackers with a graham cracker buttercream. I decided to try this approach.

The cupcakes that I got this idea from are located here. I also used their chocolate cake recipe, which turned out excellent. The cupcake recipe used a cream cheese frosting. I’m more a fan of traditional buttercream than cream cheese based frostings, so I used the concept of the graham crackers with a different buttercream recipe. I also changed the marshmallow filling, which I’ll explain in a minute.

I started with the chocolate cakes. I was working with three round 9 inch cake pans. NOTE: You will need to use 1.5 times this recipe to get three cakes. I made the recipe as is and baked two cakes, then made a half batch for my third cake.

Chocolate Cakes
Cake from Your Cup of Cake

1 3/4 cup sugar
1/4 cup brown sugar
1/2 cup vegetable oil
1 cup sour cream
2 teaspoons vanilla extract
2 eggs
2 cups flour
1 cup cocoa
1 1/2 teaspoons baking powder
1 1/2 teaspoons baking soda
1 teaspoon salt
3/4 cup boiling water

Preheat oven to 360 degrees. Grease two 9 inch round cake pans. Mix sugar, brown sugar and oil for about 3 minutes. Add sour cream and vanilla extract and mix well. Add eggs one at a time and mix only until incorporated. In a separate bowl, sift together flour, cocoa, baking powder, baking soda and salt. Add dry ingredients and boiling water to sugar mixture alternating between the two. Pour into pans and bake for approximately 25-30 minutes, or until cake passes the toothpick test.

Note: I had really liked how the marshmallow bits had turned out in the cookies. I made one extra cake with marshmallow bits swirled through the batter, but didn’t like how it turned out. The bits didn’t add much flavor or color.

Once the cakes were cool, I began the marshmallow filling. My base was my go-to recipe for vanilla buttercream, only with vanilla extract instead of vanilla bean paste. Instead of marshmallow crème, which is typical in marshmallow frosting recipes, I decided to try for a real toasted marshmallow taste.


Toasted Marshmallow Buttercream

1 tablespoon heavy cream
1 teaspoon vanilla extract
pinch of salt
1 1/4 sticks unsalted butter, at room temperature
1 1/4 cups confectioners' sugar
15 large marshmallows

Mix cream, vanilla and salt together in a small bowl. Using a stand mixer with a paddle attachment, beat the butter until creamy. Slowly add the confectioners' sugar until completely combined. Add the cream mixture and beat for 3 or 4 minutes until fluffy and smooth.

Put marshmallows on a baking sheet lined with parchment paper. Place marshmallows under oven broiler for approximately two minutes, or until they just start to brown. Watch these carefully, as they will brown quickly.


Let marshmallows cool for a couple minutes, then beat into frosting mixture. (If marshmallows are too hot, they will melt the sugar in the frosting and it will lose its fluff.) NOTE: I would double this recipe next time. I would have liked a thicker marshmallow layer, but the marshmallows were a last minute idea and I didn’t have enough of them.

Spread marshmallow mixture on top of two of the cake rounds and assemble the cake.


See those tiny light brown flecks? Don't worry, those are just pieces of the real toasted marshmallow flavor.


Now it is ready to frost.

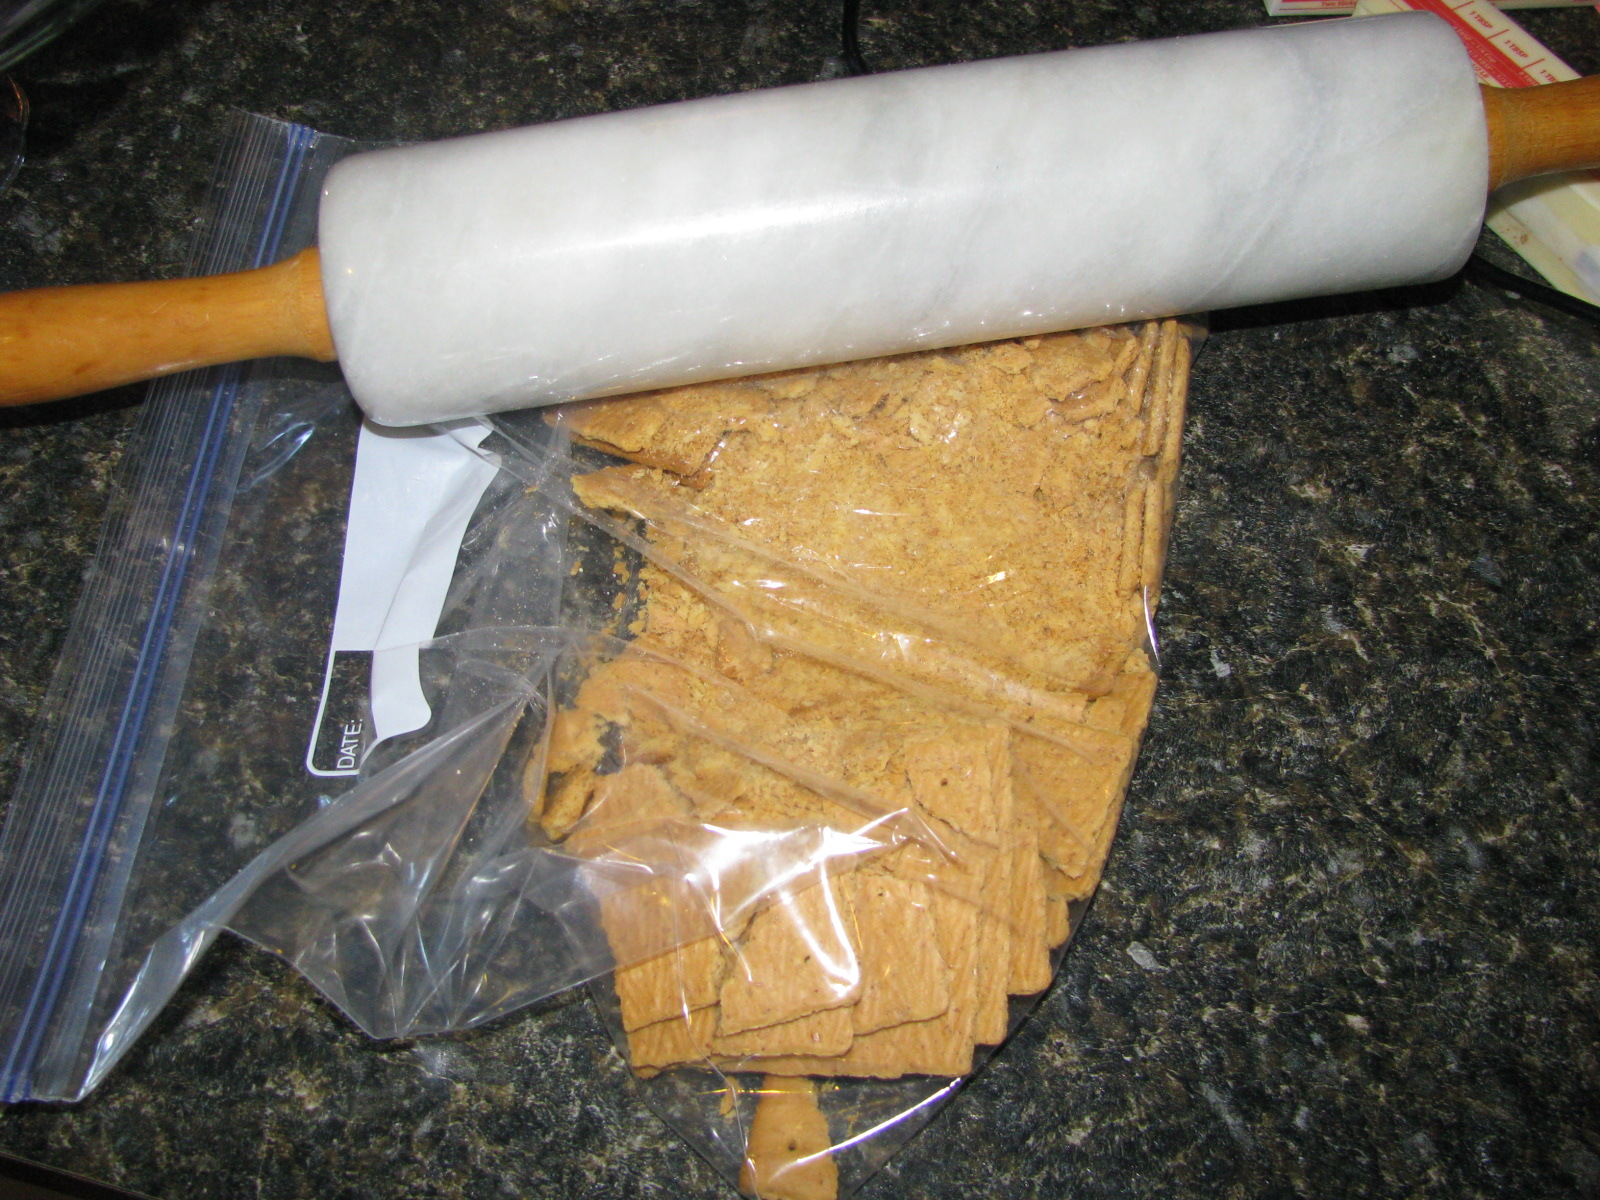
I used the same vanilla buttercream recipe for the graham cracker buttercream. First, I took some graham crackers and placed them in a Ziploc bag. I ran a rolling pin over the bag until the crumbs were very fine.

Graham Cracker Buttercream

2 tablespoons heavy cream
1 tsp vanilla extract
pinch of salt
2 1/2 sticks unsalted butter, at room temperature
2 1/2 cups confectioners' sugar
3/4-1 cup graham cracker crumbs

Mix cream, vanilla and salt together in a small bowl. Using a stand mixer with a paddle attachment, beat the butter until creamy. Slowly add the confectioners' sugar until completely combined. Add the cream mixture and beat for 3 or 4 minutes until fluffy and smooth. Add in graham cracker crumbs and beat for another minute to combine.

Once the graham cracker frosting was spread on the cakes, I used some marshmallow bits to decorate the top. I also added some chocolate shavings for a little color.


I will definitely be making this cake again, only with a little more marshmallow next time.


Saturday, February 18, 2012

Chocolate Bowls with Dark Chocolate Mousse


I’m just now getting around to posting about our Valentine’s Day feast. I’ll try to get information about our meal posted tomorrow, but for now I’ll focus on dessert. My reason for doing so is that not only is dessert important enough to warrant its own posting, but also because I had fun experimenting with this particular dessert.

I had been looking for a good opportunity to try chocolate bowls, and Valentine’s seemed like as good a reason as any. I had found multiple cooking blogs with posts involving chocolate bowls or cups, which turned out to be very helpful because each one had different tips. One suggested blowing up water balloons (as in using air, not water) because of their sturdiness. Most recommended balloons 5 inches or smaller. I found my water balloons in the party aisle at Wal-Mart for 99 cents. (The awesome tie-dye print was the store's choice, not mine.)This is also the first time I've used water balloons in baking.


The instructions varied on the type of chocolate. I always like to bake with a slightly higher quality chocolate. Since I was planning on filling the bowls with dark chocolate mousse, I decided to use some Ghirardelli semi-sweet chocolate chips. I melted an entire bag of chocolate chips in a double boiler while stirring consistently to retain a smooth texture. Once melted, I scraped the chocolate into a small glass bowl to cool. I wanted to small bowl with slightly higher sides so that my chocolate bowls would be tall enough.

Now we are to the part that made me nervous. I had read warnings that if the balloons are dipped into the chocolate while it is still too hot, the balloons would explode and send chocolate flying all over my kitchen. This didn’t sound like anything I wanted to deal with, so I followed the advice of one blogger that had said to let the chocolate cool and once you thought it was cool enough, let it cool a little more.

While the chocolate cooled, I blew up the balloons. As it turns out, one of my Helpers apparently found the balloons to be quite worrisome, as you can probably tell from her wide-eyed expression and readiness to bolt should any craziness occur.


Another helpful hint I’d found was to thoroughly clean off the surface area where you’ll keep the balloons. They tend to attract any dust or fuzz you couldn’t see beforehand. I doubt you want any of that in the lining of the bowls. Once the balloons were blown up, I lined a baking sheet with parchment paper. Before dipping the balloons, I sprayed the bottom of each with a little cooking spray so I’d have some help with peeling them off the chocolate later.

Finally, I dipped a balloon down into the chocolate until it came far enough up the sides to be tall enough for a bowl.


I set the chocolate covered balloon on the parchment paper to harden. Since this was my first attempt, I used eight balloons even though I only needed two. I recommend this just because not every bowl will turn out. I had some turn out lopsided or missing a patch of chocolate.


I would also recommend putting the pan holding the chocolate balloons into the fridge for a few minutes. I was following a recipe that said to leave the balloons on the counter for 20 minutes to allow the chocolate to set. After 20 minutes, I decided to try to remove my balloon from one of my bowls. I snipped the balloon carefully under the knot. Not only did my balloon deflate, but my chocolate shriveled up along with it. Oops. After that I stuck the remaining balloons in the fridge for another 10 minutes. This let the chocolate set enough to detach the balloon. I used scissors to snip under the knot, and then I gently pulled the deflated balloon away. Some balloons will try to stick. In removing them, I realized that the next biggest risk of chocolate bowls is leaving behind fingerprints, so be mindful of this when tugging the balloons away.


I filled the bowls with dark chocolate mousse from a recipe by Bobby Flay. For decoration, I grated some chocolate sprinkles across the top.

Monday, September 5, 2011

S'mores in a Jar


Everybody knows that s’mores are delicious. Now imagine this: you’re making a s’more, but instead of a piece of chocolate bar, there’s a molten chocolate lava cake in the center. Yep, that really just happened. This is the perfect union of s’mores and lava cake. Trust me, it’s as good as it sounds.

I absolutely love s’mores recipes. I probably save most of them that I come across. This s’mores in a jar recipe from How Sweet It Is really caught my eye. Not only was it a version of one of my favorite desserts, but I thought the mason jar idea was brilliant. In fact, I liked it so much that I had to go out and purchase mason jars just to make it.


I knew this easily portable version of s’mores would also work great for our weekend plans, which included visiting family members that were camping at the lake. (You’ll notice I said visiting other people who were camping. As much as I love s’mores, camping is not something I would choose to do voluntarily.)

I will warn you that this s’mores creation is still a bit of a work in progress. I may still try a few more variables. In my first batch I tried big marshmallows, but found they did not want to completely puff up and melt quite enough. As a kid, I seem to remember one marshmallow taking as little as 20 seconds to expand to approximately the size of the entire microwave, so I’m not sure why this wasn’t working. Anyway, I tried marshmallow crème the second batch, which had a better consistency but was way too sweet. The marshmallow topping will still require some experimentation. It may be something as simple as roasting four big marshmallows and sticking them on top before digging into all the s’mores goodness. These were also so sweet that I would consider making them in half pint jars next time.


The concept for this recipe comes from How Sweet It Is, which is one of my favorite food blogs to follow. That version uses a different recipe for the cake part. I was curious about using lava cake, since that would replicate the gooey quality of melted chocolate in s’mores. My lava cake recipe is from Taste Junction.

S’mores in a Jar:
4- 16 oz jars

Graham Cracker Bottom:
• 1 ½ cups of graham cracker crumbs
• ½ stick melted butter
• dash of salt

Put graham crackers into gallon Ziploc bag and use rolling pin to crush. Mix graham crumbs with melted butter. Spray each jar with non-stick cooking spray. Put approximately 6-7 tbsp of the graham cracker mix in the bottom of each jar. I used an ice cream scoop to press it down evenly.


Lava Cake Center:
•4 tbsp unsalted butter, room temperature
•1/3 cup granulated sugar
•3 large eggs
•1/3 cup all-purpose flour
•1/4 teaspoon salt
•1 tsp vanilla extract
•6 ounces bittersweet chocolate, melted & cooled

Preheat oven to 400 degrees. Cream butter and sugar until fluffy. Add eggs one at a time, stirring after each addition. Stir in vanilla. Beat in flour and salt just until combined, then beat in melted chocolate just until combined. The chocolate can be melted in the microwave if you stir every 30 seconds until smooth. I used semi-sweet since that is what I had in my cabinet. I prefer this recipe with bittersweet, but semi-sweet may seem closer to the milk chocolate of traditional s’mores.

Scoop batter into the jars until they are about half full. I used a ¼ measuring cup and this turned out to be approximately ¾ cup batter for me. Place jars in a baking pan with 1 ½ cups of water in the bottom. Bake until the top of the cake is just set. I baked mine about 15 minutes, but mine was still too gooey. I’m guessing 20-25 minutes would be closer.


Once jars are out of the oven, fill in some marshmallow crème or marshmallows. Place under the broiler for about 1-2 minutes until top starts to brown. For my second attempt, we used marshmallow crème, but placed a couple marshmallows on top just for the appearance.


My biggest concern about this recipe was baking in the glass jars. The last thing I needed was a shattered glass mess in my oven. The first time I tried these, I used a recipe that called for 350 degrees. That worked fine, but then I was still a little hesitant about the lava cake recipe that baked at 400. After doing a little research online, it appeared that lots of people have recipes for cakes or pies in jars.

The Helpers were in curious mode the day I made these. Helper #1 impatiently waited for me to move the jars out of their box so she could commandeer it.


Helper #2 impatiently waited for someone to drop some buttery smelling crumbs within her reach.


Stayed tuned for more versions of this recipe. My husband has suggested a version where the layers are alternated more frequently. For example, there'd be small layers of graham cracker, chocolate cake, mini marshmallows, graham cracker, cake, marshmallows, etc. If any of you have some suggestions, I'd love to hear them!

Thursday, September 1, 2011

Rich Fudge Brownies with Cherry


Sometime after my last post, this blog hit 1,000 viewers. I never had any real expectations for the blog, so I’m pleasantly surprised that people are showing any interest. In celebration of this milestone, I made my mother’s rich fudge brownies. I should probably warn you that something as exciting as an odd-numbered day is enough excuse to “celebrate” with these brownies. They’re rich and super gooey in the middle, with the thinnest layer of crispiness of the top. I believe the last time this brownie recipe made an appearance was in our church’s cookbook back in 1990. There may be a handful out there in possession of said book that have gotten to revel in this chocolate deliciousness. If you haven’t, your wait is officially over.

As with a lot of the recipes I’ve tried, I added something extra this time. I have been somewhat obsessed with cherries over the summer, especially after my luck with pairing them with scallops. I’ve seen some recipes popping up, such as here and here, that involve putting roasted cherries in the brownie batter. I tend to be a bit of a purist when it comes to chocolate. Sometimes caramel is ok, but I have no use for additions such as fruit or nuts of any kind. Sometimes a simple square of dark chocolate is perfection, and we all know it’s a bad idea to mess with perfection. That said, I finally decided to make an exception. I should probably note that my poor mother, who dislikes cherry, probably would not approve of my addition to the recipe.

I started by roasting a cup and a half of cherries that were pitted and halved. I mixed those with a couple teaspoons of sugar and spread them out on a baking sheet.


The cherries are then baked at 450 degrees for about 5-7 minutes. The cherries will start to release some juice. The main thing to watch for is that the sugar doesn't start to burn. Once they are out of the oven, you’ll want your temperature down to 300. This gave the cherries a chance to cool as the oven did.


As for the brownies, the ingredients are as follows:

• 1 cup butter (original recipe says oleo)
• 4 squares unsweetened baking chocolate
• 4 eggs (beaten)
• 2 cups sugar
• 1 cup flour
• 2 tbsp vanilla

Start by melting the butter and chocolate over medium-low heat. You’ll want to use a pan large enough to add the other ingredients also. Stir pretty consistently until melted.


Next, add the sugar, followed by the eggs. I add the eggs after the sugar to avoid scrambling them with the hot chocolate mixture. Add the flour, followed by the vanilla.


Stir in cherries or other desired mix ins. Pour into a greased 9x13 pan. Bake until done, which is usually about 40-45 minutes. I go by the toothpick test.


Now you know these brownies are serious because they call for two sticks of butter and two cups of sugar. I’m not sure if this is enough to make Paula Deen proud, but I think we’d at least get a nod of approval. This makes a large pan, so there’s all the more for you to addictively snack on share with your friends.


I'll end this post with a picture of my Helpers, who have not made an appearance on the blog in awhile. Desserts do not hold near the appeal that other dishes do, so they spent their time lounging in the sun and observing.


Sunday, May 1, 2011

S'mores Bars


I’d promised earlier that there would be lots more posts about s’mores recipes.  Well, I’ve finally gotten around to posting a second one. 

People who like to bake all have a similar problem.  Once you’re done baking and have enjoyed one piece of deliciousness, you realize you have a lot of leftovers.  Even though that might sound great, it’s not so good for your health.  Luckily there is a simple solution for this problem.  You find some unsuspecting victims to unload these leftovers on.  I’m not sure victim is the appropriate word, as most of these people are usually more than willing to help you out.  So when the baking urge hit last week, I decided to go with a s’mores recipe that could be easily transportable the next day. 

The amount of s’mores recipes I have bookmarked is ridiculous.  I could probably keep a blog going for awhile on those recipes alone.  Some are more complex than others, but this s’mores bar recipe is one of the easier ones. 

For those of you that bake, you’ll notice that it’s basically a graham cracker topped with a chocolate chip cookie with mini marshmallows mixed in.  I’m always a little skeptical of recipes that try to add chocolate and marshmallow to something and call it a s’more.  Then I realized something.  So what if it’s basically a graham cracker topped with a chocolate chip cookie with mini marshmallows mixed in?  That sounds delicious. 

For this recipe, I used a recipe from Always with Butter.  First, mix up the cookie dough.
Next, lay out graham crackers on a standard size baking sheet.
Scoop out balls of dough onto the graham crackers.  I use a Pampered Chef cookie scoop.  The directions didn't specify, but I put a scoop per square.
After baking for 5 minutes, press broken up pieces of the Hershey bars into the cookies. (I used 2 instead of 3.)  This also gives you the chance to flatten them out so your cookie won't be so round.  Bake for the remaining time.
 

Once cooled, cut into squares. I was having a horrible time getting good pictures.  It's especially apparent in this picture of the final product.
I think I might try this recipe for regular chocolate chip cookies.  The cookies themselves were fantastic, especially with the cinnamon addition.  For the regular cookies, I’d leave out the marshmallows and use about ½ the cinnamon.  As for the s’mores bars, the graham cracker adds a nice crunch. The graham cracker does tend to get a little soft if not eaten in the first couple days, but the chance of there still being bars left after a day or so isn’t likely. 


Monday, April 11, 2011

Chocolate Chip Cookie Dough Cupcakes

The next cupcake recipe was one that I figured my husband, who’s a big fan of cookie dough ice cream, would enjoy.  The blog Annie’s Eats had posted a recipe for chocolate chip cookie dough cupcakes that food bloggers everywhere were clamoring to try. Who can blame them?  Cookie dough plus cupcakes is a hard combo to beat. 

What intrigued me most about the cupcakes was the cookie dough flavored icing.  A cup of flour in frosting seemed a little odd.  My fears went away the minute I tasted it.  This frosting totally makes the cupcakes.  It really does taste like cookie dough. 

As for the center of the cupcakes, a portion is hollowed out to allow a ball of cookie dough to be placed inside.  This eggless cookie dough is made with sweetened condensed milk. 
The only portion of the cupcakes I wasn’t crazy about was the cake itself.  A brown sugar cake recipe is used to pull all the cookie flavors together.  The cake wasn’t bad, but it didn’t add a lot of flavor either. It was a little crumbly instead of fluffy.  I think a good white or butter cake recipe would be just as good, if not better.   To save some steps, a box cake mix could even be used, especially since it acts as a base to showcase the frosting and stuffing.

Dark Chocolate Salted Caramel Cupcakes

I mentioned earlier that it is common at my husband’s workplace to bring treats for everyone on your birthday.  This gave me a good excuse to try out a couple cupcake recipes I’ve had my eye on. 

I had happened across this recipe for Dark Chocolate Salted Caramel Cupcakes.  What part of that doesn’t sound good?  I used Glorious Treats’ recipe for the dark chocolate cupcakes.  I did cheat on the caramel sauce by using Smuckers ice cream sauce.  (There are a few things where the homemade version is just not going to make enough difference to be worth the trouble of doing it yourself.) 

The cake batter was really easy to mix up. It turned out very moist.  In fact, it was so moist that the poor caramel sauce soaked in and left a void where it was supposed to sit. I’m wondering now if substituting a caramel square instead of the syrup might work.  It could probably be baked in the cupcakes or placed in right out of the oven. 
The cupcakes themselves had a great, rich flavor.  I wasn’t a huge fan of the chocolate and cream based ganache recipe.  I love dark chocolate, but it was still a little too bitter.  The chocolate glaze recipe from the smores cupcakes I made a couple months ago might be better.  I'll have to try that next time.

Saturday, April 9, 2011

Triple Layer Oreo Brownies

I recently ran into an Oreo brownie recipe that looked too good to resist   It just so happened that my husband and I were meeting up with family later, so I had some unsuspecting victims to unload these super rich brownies on.  The brownies consisted of a brownie base stuffed with an Oreo.  The baked brownies were then covered with crushed Oreos and chocolate chips before being stuck back in the oven for a couple minutes.  Surely this was the end of the chocolate assault?  Nope.  Next, the entire batch was covered with a chocolate and peanut butter sauce.  You can see why I didn’t want to leave these around the house for myself. 
Since we are taking about a recipe involving Oreos, I have to take a minute to get something off my chest.  Use real Oreos, people!  There is nothing worse than someone telling you they’ve made an Oreo recipe, only to find out they’ve actually used fake Oreos.  People that offer up fake Oreos are not only oblivious, but rude.  It’s flat out insulting.  I saw a few version of this recipe using knock-off Oreos, but I wouldn’t even consider that. 

I was a little concerned that there was too much flour going into these brownies.  To me, the brownies turned out a little too cake like, which was odd since the brownie pictures in the recipe looked very dense and moist. I also didn’t have enough chocolate chips to fully complete the topping.  (Silly me- I only had 1 complete bag & about ¼ of another!) This meant I just drizzled the chocolate over the top instead of letting it completely cover it.  I still found the sauce, especially the peanut butter addition, to be a little too much.